Emergency stop: Briefing & Demonstration
Teaching the emergency stop
 You can start this lesson with a briefing and/or demonstration. We suggest both.
It is often suggested that you should go through a full 'dry run' as part of your briefing, however, this will extend your briefing time and can sometimes be confusing - this is not a good idea!
However, you must ensure that your learners understand how to stop and the signal that you will give to prompt the stop. With this in mind it might be worth doing a quick 'gas pedal to footbrake' exercise.
Before moving off: Explain the signal that will be used to prompt the emergency stop and then demonstrate it a couple of times. On the second demonstration ask your pupil to move his/her foot quickly from the gas pedal to the footbrake - this might uncover a problem of missing the pedal or stamping too hard.
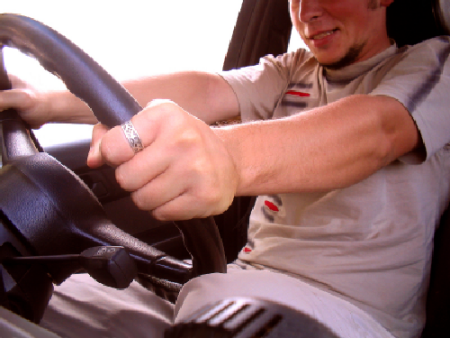
The signal to stop should be the same as that used by examiners. Raise your right hand to shoulder level and then bring it down and forwards while saying 'STOP!' in a positive and firm voice.
It's important to make sure that it is 100% safe to complete this manoeuvre every time it is done; with this in mind, before giving the signal to stop you must ALWAYS have a quick glance back over your right shoulder - do not rely on mirrors alone.
Also consider the location. If possible (which it should be) avoid stopping near junctions, parked cars or other situations that could be construed as potentially hazardous.
Talk-through
The emergency stop is a fairly simple exercise to talk-through using the method below. Talking through the exercise can give you more control than simply saying 'stop' and might be helpful for some customers.
Explain that you will give the command 'Stop!' (accompanied with the right arm movement used by examiners) and then immediately say the words 'and clutch'. The pupil presses the clutch when you say the word (clutch) - not before!
You can also heighten the chances of success by telling the pupil that the command will come 'in the next 50 metres' or whatever.
Example
Your instruction might be something like this on the move.
"Change up to third gear and hold the speed at between 15 and 20 mph. In a moment, before we get to the end of this row of houses, I will give the command.
Remember that you should react as soon as you hear the words, but not before."
You then check over your shoulder for added safety and give the command almost immediately:
"Stop – and – Clutch. Handbrake on, select
neutral – deep breath. Relax!"
After the stop, ask the pupil to move off and park at the side of the road - prompting the observation checks if necessary.
Some learners might start a discussion about the manoeuvre while the car is still in the initial stopped position - explain that you must move to a safe parking position before talking about what happened.
Brake and Clutch together: Most, if not all, car handbooks say that the brake and clutch should be used together in an emergency situation (when ABS will be activated). The information above gets the learner to press the brake pedal momentarily before the clutch - this is to remove the small risk of 'surge'.
If the clutch goes down before the brakes bite the car can momentarily surge forwards. The momentary surge would be unlikely to 'phase' an experienced driver, but for a learner doing the stop for the first few times it could possibly cause a slight hesitation. By using the sequence 'brake- clutch' the brakes will always bite before the clutch disengages.
Skid control
It is unlikely that you will need to teach skid control as a practical exercise - simply cover the key points in a briefing keeping it simple. This can be done after initial practise of the exercise or in a separate lesson.
Example
 "Skids are caused by the driver, but road conditions can aggravate the situation; that is why you should always be careful on slippery or poor road surfaces.
There are three main causes of skids - braking too hard, accelerating too fiercely or rough use of the steering. Given that today's lesson is about emergency stops, the most likely cause of a skid would be harsh braking.
If the wheels lock you will not be able to steer, the car might also slide to the left or right.
First, remove the cause of the skid - do this by releasing the brake pressure and then quickly re-applying it (demonstrate with the dual footbrake pedal). Then correct the skid by turning the wheel the same way that the car is skidding"
Use the diagram from your Visual Teaching System as a visual reference while explaining this.
ABS
All modern cars are fitted with ABS - explain the importance of keeping the brake pedal pressed in an emergency, and the fact that there may be a vibration through the pedal. Also explain the procedure for stopping as it applies to your vehicle (consult your handbook if you are unsure about this).
Teach your customers to check the warning lights on the dash when starting the engine as a matter of course to see if ABS is present. In addition, explain exactly what BS is for and that it's a safety feature for emergency situations - it should never activate in normal driving, except perhaps in very wintry conditions.
Also explain that there are still older cars on the road that do not have ABS. You can give brief explanation of how to stop in an emergency in a non-ABS car, however it would probably be better to suggest that the customer visits you again for an emergency stop lesson if they get a none ABS car.