Teaching HPT
Unfortunately for their customers, there are still some driving instructors who don't use the hazard perception test as a productive tool - they treat it it as if it's simply 'something you have to do for the test'. These instructors are missing a valuable training opportunity and doing their customers a disservice.
The Hazard Perception Test is a great way of getting novice drivers to think about the potential dangers around them and ask themselves:
- What type of road am I on?
- Why is there a hazard warning line down centre of road? (More paint more danger.)
- Why is there a warning triangle at this junction?
- What can I realistically expect to happen?
- What is constantly changing and how will it affect me?
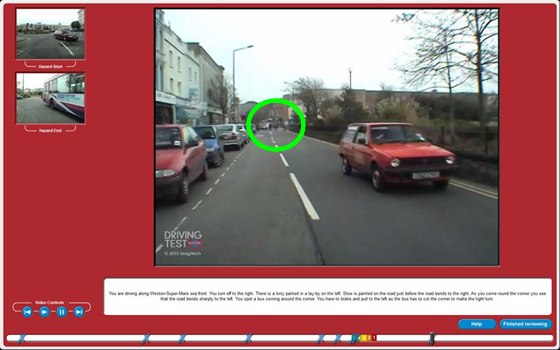
Look at the screen-shot below taken from the sequence on the previous page.

- You can see cars parked on the left
- We know that the road is a bus route - will a bus swing into this road and cause me to slow?
- Will anyone step out in between the cars
- And of course, the pedestrians ahead
There are not too many problems on RH side of road so we can almost ignore this.
Raising awareness
When we teach learners to drive, we must make them aware of constantly changing road conditions that are affected by the time of day, the weather and other road users. They we need to factor in the driver's level of concentration, mood and intentions.
As an example, imagine being late on the school run...
- You are in busy traffic
- It's raining hard
- The kids are screaming in the back
- The radio is on
- Other road users also late and in a hurry to get to work
All of this adds up to a potentially lethal situation where the driver's main concentration is on the clock rather than on everything else that's happening.
So when you are watching the hazard perception clips and later on when teaching - remember that the situation is constantly changing. You are looking for things that may cause you to change speed or direction (1 click) and things that will cause you to change speed or direction up to 3 clicks maximum - ideally 2 clicks.
Next: Step 6 explains how to save and print results and how to take screen-shots from the disc. This is important because we will request some information from you when assessing your test-readiness.