Printing, saving and taking a screen-shot
As part of your exam preparation we will request information from your practise sessions. You can supply this via printouts from the DVD.
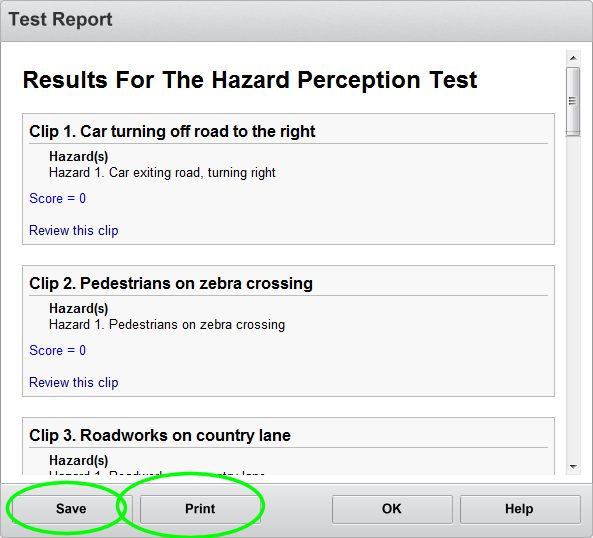
The instructions below explain how to save and print out your results.
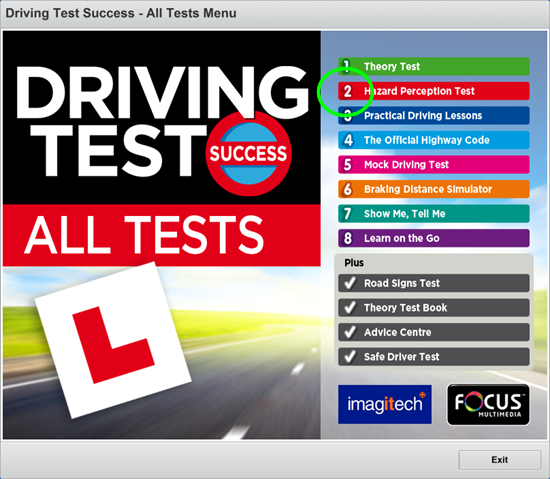
1. Load the disc – select item number 2 'Hazard Perception Test' from the menu.
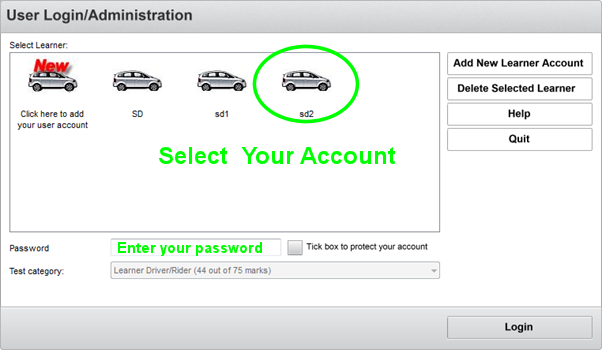
2. Log in to your disc user account
Select your account and enter your password
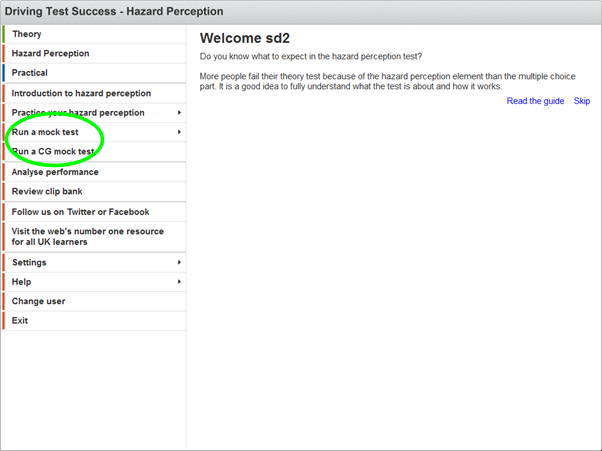
3. Select Run a mock test or CG Mock Test
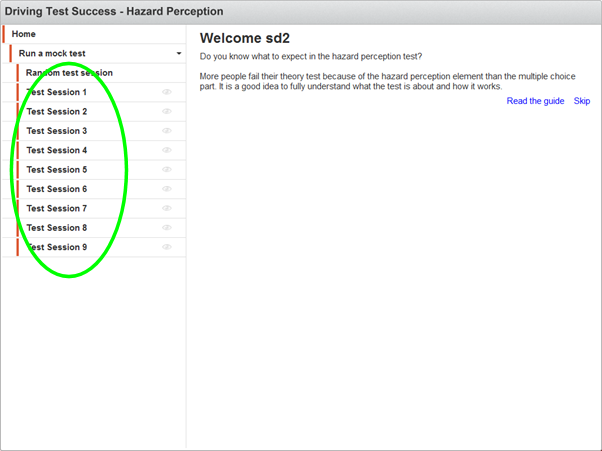
4. Pick a number (Test Session)
5. Clicking with your right-hand mouse button (right-click) you will bring up a box that lets you skip intro
(Note that we advise you do listen to the intro at some point)

6. You can now run a test...
Or alternatively right-click to abort and go straight to the final screen where you can print or save your results.
To take a screen shot
Run the review of any clip and pause the video at the first click (you can drag the cursor along by left click of mouse, hold and drag)

Hold down the Ctrl key - this is usually bottom left of keyboard - and while holing it, press the Prt Scr key - usually top right of keyboard. The image below shows a typical keyboard, the position might vary slightly on your device.

Using the screen-shot
Open an email or word document – right-click and paste. The image should appear.
Please do this separately for every click on one clip - this will enable us to see why and when you are clicking.
Next: If you have studied the information in this unit thoroughly you are ready to start HPT practise. You can start to practise now or move on to Unit 16 by clicking the 'Next' link below.